If you have been googling “oracle apex login” or “oracle apex workspace” and ending up on Oracle’s official docs that feel like they were written for robots, you are in the right place.
I am Hassan Raza, an Oracle ACE Apprentice and Senior Oracle APEX Developer. I work with APEX daily, building enterprise apps used by 7000+ users. And I still remember the first time I tried to set up APEX on Oracle Cloud for Oracle developer career growth. It was not hard, but no one explained it in a way that actually made sense.
So that is what I am doing here. Let me walk you through the whole thing, from zero to your first working app, using Oracle Cloud’s Always Free tier. No credit card tricks, no surprise bills.
What Is Oracle APEX (And Why Should You Care)?
Oracle APEX (Application Express) is a low-code development platform that runs on top of an Oracle database. You build full web applications mostly through a browser-based interface, with SQL and PL/SQL doing the heavy lifting on the backend.What makes it special is that it is fast. Not just fast to run, but fast to build. Things that would take weeks in a traditional stack can be done in days with APEX. That is why companies trust it for serious enterprise work.And the best part? Oracle gives you a fully functional APEX environment for free through Oracle Cloud Free Tier. No time limit. Genuinely free.
Step 1: Create Your Oracle Cloud Account
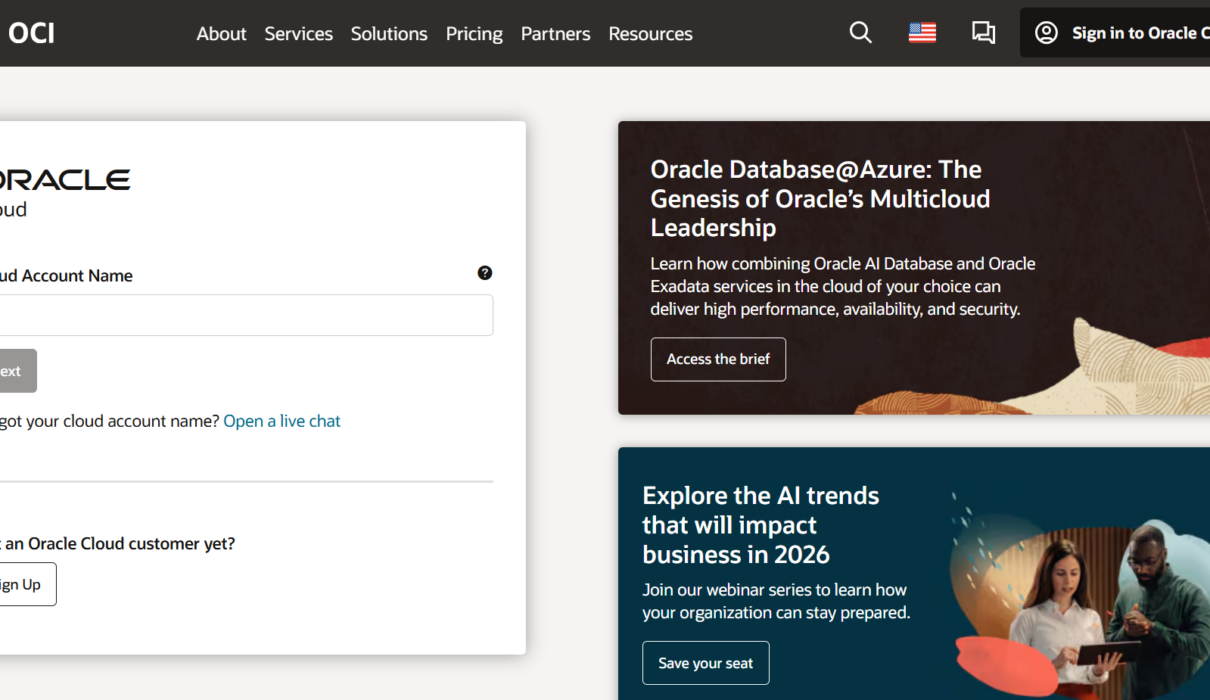
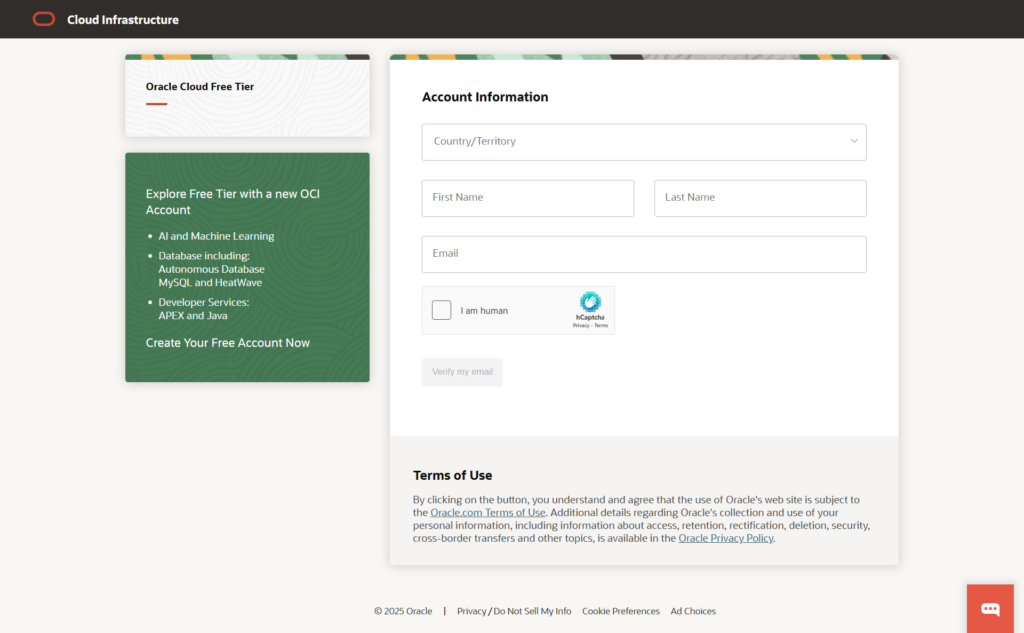
Go to cloud.oracle.com and click Start for free.
You will need to fill in your name, email, country, and a few other details. At some point it will ask for a credit or debit card. This is just for identity verification. As long as you stick to the Always Free services, you will not be charged anything. Choose your home region carefully during signup. Once it is set, you cannot change it. I went with a region that is geographically close to my users, and that is what I recommend you do too.
After you verify your email and complete the signup, you will land in the Oracle Cloud Console. This is your main dashboard.
Step 2: Create an Autonomous Database
APEX runs on top of an Oracle database, so you need one first. Oracle Cloud’s Autonomous Database is the easiest way to get this running.
In the Cloud Console, go to the menu and look for Oracle Database, then click Autonomous Database.
Click Create Autonomous Database and fill in the details:
- Display name: Something simple like “MyAPEXDB”
- Database name: Keep it short, no spaces
- Workload type: Select Transaction Processing or APEX (if you see the APEX option, go with that)
- Deployment type: Shared Infrastructure
- Database version: Go with the latest available
- ECPU count: 2 (this is within the free tier)
- Storage: 20 GB (also free tier)
- Password: Set a strong password for the ADMIN user. Write it down somewhere, you will need it.
Make sure Always Free is toggled on. Then click Create Autonomous Database.
It will take a minute or two to provision. Once the status shows as Available, you are good to go.
Step 3: Access Oracle APEX Workspace
Now here is the part people get confused about. Your database is ready, but you still need to get into APEX itself.
On your Autonomous Database details page, click the Tool configuration tab or look for the APEX button. Click Open APEX.
This will take you to the APEX Administration Services page. Log in with the username ADMIN and the password you set when creating the database.
Once you are in, you need to create a workspace. Think of a workspace as your personal APEX environment where you build and run your apps.
Click Create Workspace and fill in:
- Workspace name: Something that makes sense to you
- Schema name: This creates a new database schema. Give it a good name.
- Workspace username: This is the APEX login you will use day to day
- Workspace password: Set a strong one
Click Create Workspace, then sign out of the admin area.
Now go back to the APEX login page and sign in with your new workspace credentials. This is your actual working environment.
Step 4: Log In to Your Oracle APEX Workspace
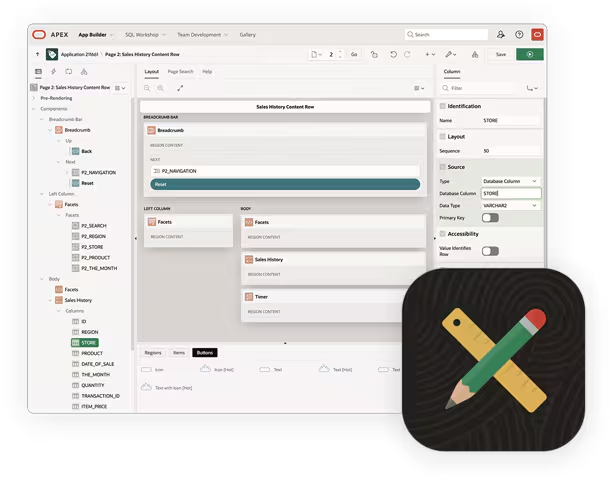
After you sign in, you will see the APEX App Builder. This is where everything happens.
The URL for your workspace login looks something like this:
https://apex.oracle.com/ords/r/apex/workspace-sign-inBut for your Autonomous Database, it will be specific to your cloud URL. Bookmark it. You will use it a lot.
From here you can create apps, manage database objects, write queries, and deploy everything without leaving the browser. That is the magic of APEX.
Step 5: Build Your First App (A Simple Task Manager)
Alright, let us actually build something. A task manager is perfect because it covers the basics: a table, a form, a report, and some basic UI. First, create a table. Go to SQL Workshop, then Object Browser, then click Create and select Table. Create a table called TASKS with these columns:
TASK_ID(Number, Primary Key)TASK_NAME(Varchar2, 200)STATUS(Varchar2, 50)DUE_DATE(Date)CREATED_ON(Date)
Now go back to App Builder and click Create. Choose New Application. Give your app a name like “My Task Manager”.
APEX will ask you to add pages. Click Add Page and choose Interactive Report. Select your TASKS table as the data source. APEX automatically generates the report and a form to add and edit records.
Click Create Application and let APEX do its thing.
Once it finishes, click Run Application. You will see a fully working web app with a report, a form, navigation, and even a mobile-friendly layout. All generated from your table.
That is Oracle APEX. That is what it does.
A Few Things Worth Knowing
The Always Free tier gives you 20 GB of storage and enough compute to run real applications. I have seen people run small production apps on it without any issues.
APEX gets updated regularly and your Autonomous Database gets patched automatically. You do not have to manage any of that yourself.
If you ever lose your workspace URL, just go back to your Autonomous Database in the Cloud Console and click Open APEX again. It will take you to the login page.
What Is Next?
Once you have your workspace set up and your first app running, there is a lot more to explore. Things like Interactive Grids, Dynamic Actions, APEX Collections, REST APIs, and authentication schemes. Each of these opens up a new level of what you can build. I will be covering all of these in upcoming posts on this blog as part of my Oracle ACE Apprentice journey.
If you have questions or got stuck somewhere in this guide, drop a comment below. I read every single one and I am happy to help.
And if this was useful, share it with someone who is just getting started with Oracle APEX. That is how this community grows.
Hassan Raza
Oracle ACE Apprentice | SH Software Solution, Pakistan
9 Comments
Comments are closed.